2022-11-01 · 4분
Docker Basics
This post is over 2 years old. The content may be outdated.
Installing Docker
sudo apt-get update
sudo apt-get install \
    ca-certificates \
    curl \
    gnupg \
    lsb-release

sudo mkdir -p /etc/apt/keyrings
curl -fsSL https://download.docker.com/linux/ubuntu/gpg | sudo gpg --dearmor -o /etc/apt/keyrings/docker.gpg

echo \
  "deb [arch=$(dpkg --print-architecture) signed-by=/etc/apt/keyrings/docker.gpg] https://download.docker.com/linux/ubuntu \
  $(lsb_release -cs) stable" | sudo tee /etc/apt/sources.list.d/docker.list > /dev/null

  sudo apt-get update
If apt-get update errors out, just enter the command below.
sudo chmod a+r /etc/apt/keyrings/docker.gpg
sudo apt-get update
Then finish the install with the command below.
sudo apt-get install docker-ce docker-ce-cli containerd.io docker-compose-pluginPulling a Docker OS image
docker pull <image>:<version>I just roughly typed what I wanted and it all worked. Enter something like docker pull ubuntu:20.04.
docker imagesThe command above lets you check the downloaded images.
Running Docker
docker run -itd --name <name> --net <network adapter> -p <src port>:<dst port> [-p...] <image name> /bin/bashWritten out a bit long, you can use it like the above. You can enter the container made this way with the command below.
docker attach <container name || container ID>

OR

docker exec -it <container name || container ID> /bin/bash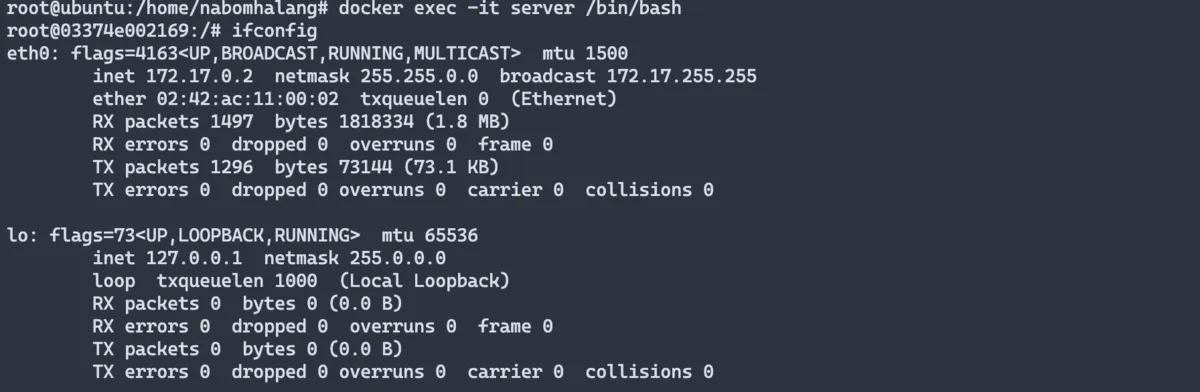
docker exec -it server /bin/bash
And if you type exit to leave, the container shuts down. If you don't want that, press control + p + q and you just drop out.
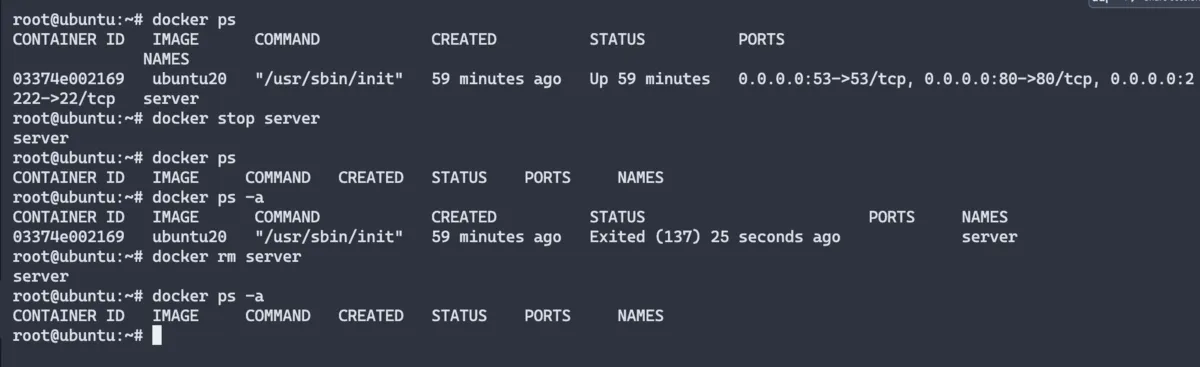
docker ps [ -a]The command above shows the currently running containers.

docker ps
docker stop <container name || container ID>

docker rm <container name || container ID>

docker start <container name || container ID>
You can halt a running container with stop. But stopping isn't the end: it still shows up in docker ps -a, so a new one with the same name can't be created. In that case remove it completely with rm. And if you accidentally typed exit and fell out, you can start it again with start.
But once you're actually inside the container there's no vim, no ifconfig, no systemctl — though systemctl can be solved with a command like the one below.
docker run -itd --name server --privileged -v /sys/fs/cgroup:/sys/fs/cgroup:ro --net Anet -p 0.0.0.0:2222:22 -p 0.0.0.0:80:80 -p 0.0.0.0:53:53 ubuntu20 /usr/sbin/initThe --privileged -v /sys/fs/cgroup:/sys/fs/cgroup:ro part and /usr/sbin/init must be included. It's easiest to think of it as granting permissions.
If you give a port option like 0.0.0.0:2222:22, SSH inside this Docker server is on port 22, but to connect from outside you connect on port 2222 and port forwarding hands it over to port 22 inside Docker.
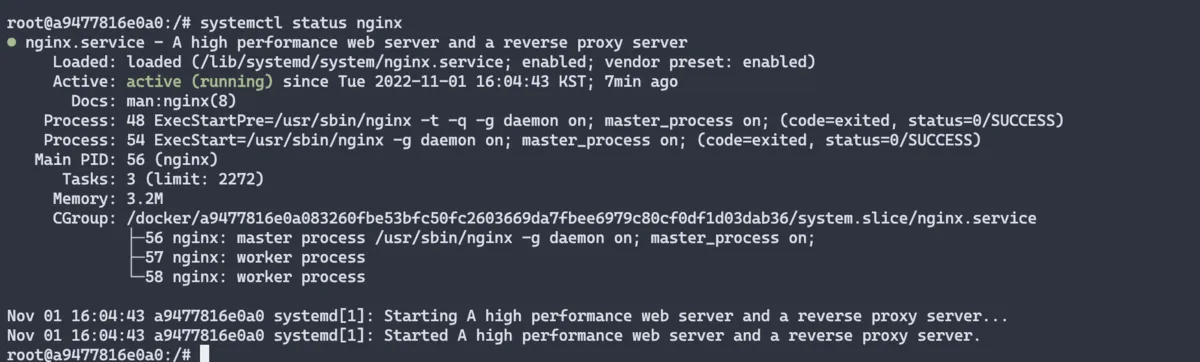
As in the picture above, you can see the systemctl command works fine. Only then is systemctl enable <service> possible, so the services come up the moment the container starts.
Managing Docker networks
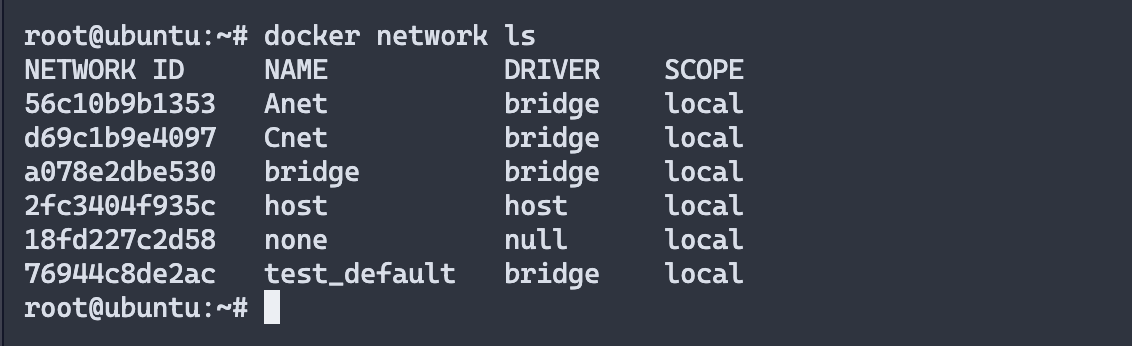
This shows the networks that currently exist. When you don't write --net <NETWORK ID | NAME> in the docker run command, it defaults to bridge. In that case the default Docker IPv4 is as follows.
docker0: flags=4099<UP,BROADCAST,MULTICAST>  mtu 1500
    inet 172.17.0.1  netmask 255.255.0.0  broadcast 172.17.255.255
    inet6 fe80::42:b4ff:fe53:a7a7  prefixlen 64  scopeid 0x20<link>
    ether 02:42:b4:53:a7:a7  txqueuelen 0  (Ethernet)
    RX packets 1323  bytes 56348 (56.3 KB)
    RX errors 0  dropped 0  overruns 0  frame 0
    TX packets 1522  bytes 1821313 (1.8 MB)
    TX errors 0  dropped 0 overruns 0  carrier 0  collisions 0
It's 172.17.0.1, and if you don't set a net it counts up one at a time from there, like 172.17.0.2.
Below is the command that creates a network.
docker network create --subnet <network arange> --gateway <gateway Ipv4> <NETWORK NAME>As an example, entering docker network create --subnet 192.168.10.0/24 --gateway 192.168.10.254 netcard creates it with the IPs you set, and joining with docker run --net netcard gives you an IP like 192.168.10.1.
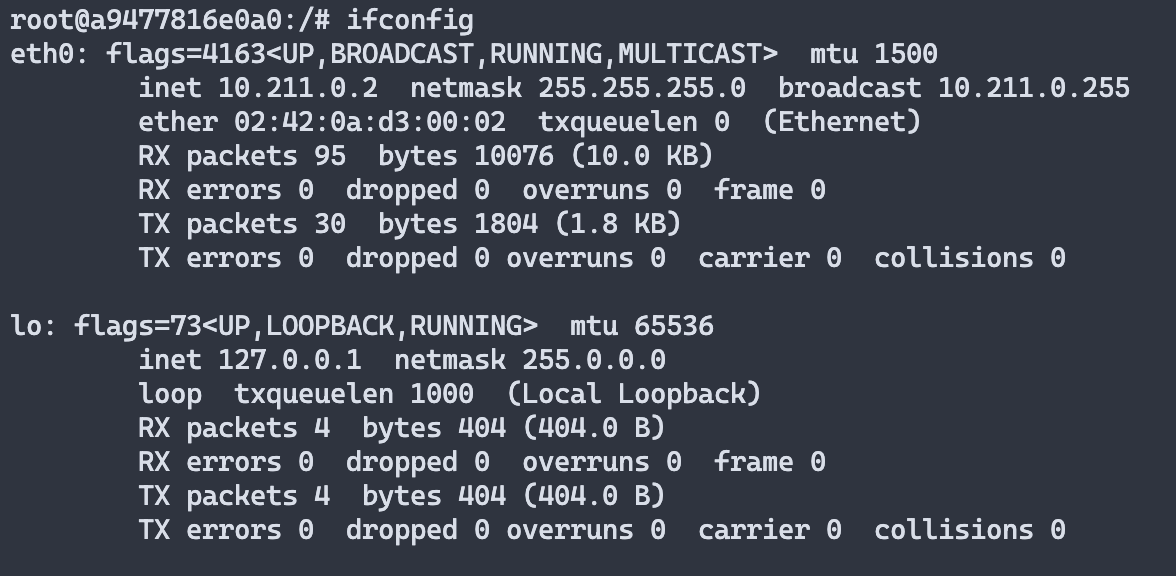
Let me show you the IP of the example created above.
root@ubuntu:~# docker inspect Anet
[
    {
        "Name": "Anet",
        "Id": "56c10b9b13534d94e05af9cd430fab03bf6cdb6ee11e0978c12a96b0833f73ad",
        "Created": "2022-11-01T14:21:51.268503946+09:00",
        "Scope": "local",
        "Driver": "bridge",
        "EnableIPv6": false,
        "IPAM": {
            "Driver": "default",
            "Options": {},
            "Config": [
                {
                    "Subnet": "10.211.0.0/24",
                    "Gateway": "10.211.0.1"
                }
            ]
        },
        "Internal": false,
        "Attachable": false,
        "Ingress": false,
        "ConfigFrom": {
            "Network": ""
        },
        "ConfigOnly": false,
        "Containers": {
            "a9477816e0a083260fbe53bfc50fc2603669da7fbee6979c80cf0df1d03dab36": {
                "Name": "server",
                "EndpointID": "7aca5c8a4b0ecad82cb435819ec1ea96c5dab7ab74cb50f1b74992e3971ec59f",
                "MacAddress": "02:42:0a:d3:00:02",
                "IPv4Address": "10.211.0.2/24",
                "IPv6Address": ""
            }
        },
        "Options": {},
        "Labels": {}
    }
]
The IPv4 info matches the JSON above, and since 10.211.0.1 is the gateway, you can see IPv4s were assigned starting from 10.211.0.2. To get JSON info like the above, enter docker inspect
Beyond this there are also things like --link. Knowing this much should be enough to use all of Docker's features.
Original (Korean): tistory — published 2022-11-01, migrated to this blog. This translation was generated with the help of AI.
Comments
…