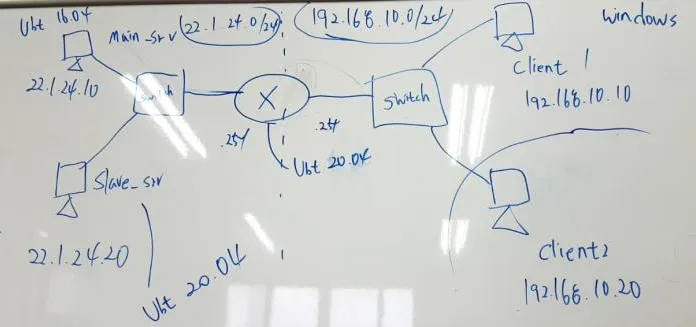
Topology
Network Type
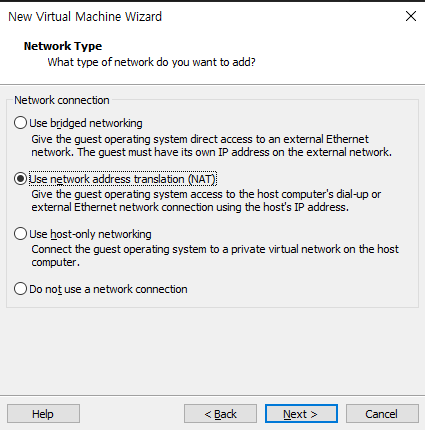
1. use bridged networking → uses the actual PC's LAN card. If connected to another PC via LAN cable, it can also be reached from that other PC's VMware.
2. use network address translation (NAT) → uses NAT.
3. use host-only networking → creates a virtual network.
4. Do not use a network connection → don't use it
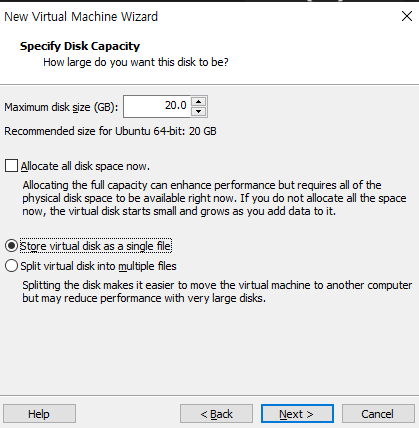
I recommend creating it as Store virtual disk as a single file
Network configuration
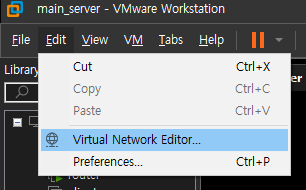
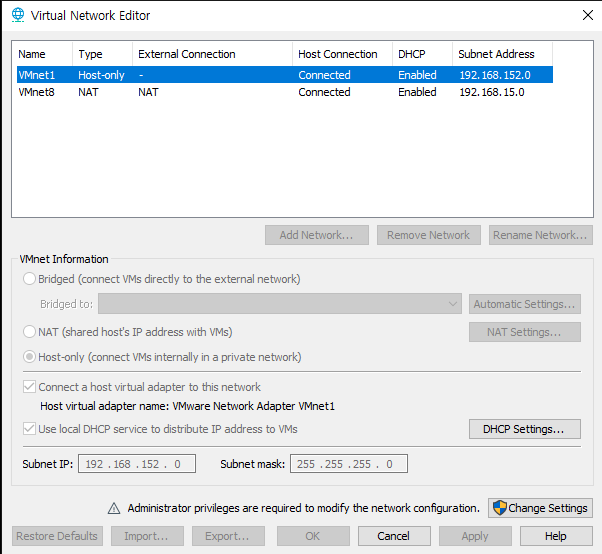
First, click Change Settings to switch to administrator privileges.
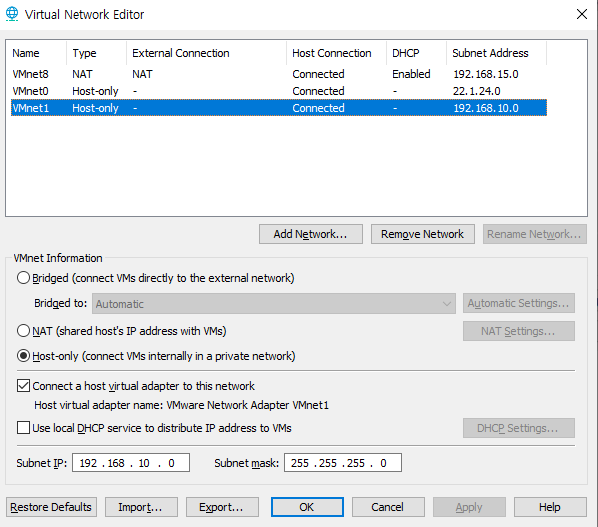
Looking at the topology, to bundle the left main_server and slave-server into one virtual network 22.1.24.0/24, and bundle client1 ~ 2 into 192.168.10.0/24, we create 2 virtual networks.
Now we have to configure each network Adapter.
main_server
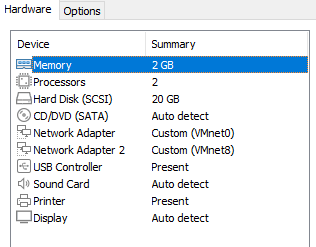
slave-server
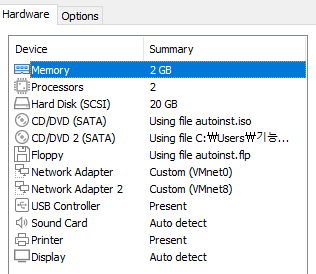
router
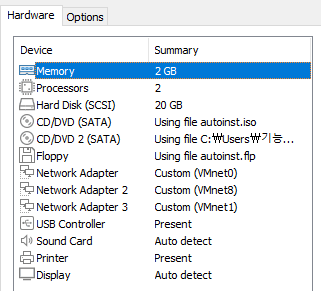
Since the router must connect on both sides, configure all of VMnet0, VMnet1, and VMnet8.
client
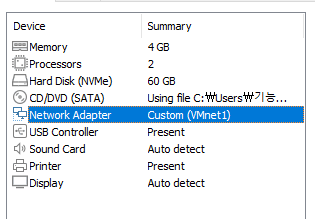
※ VMnet8 is configured for internet (packet) download.
Client Windows Setting
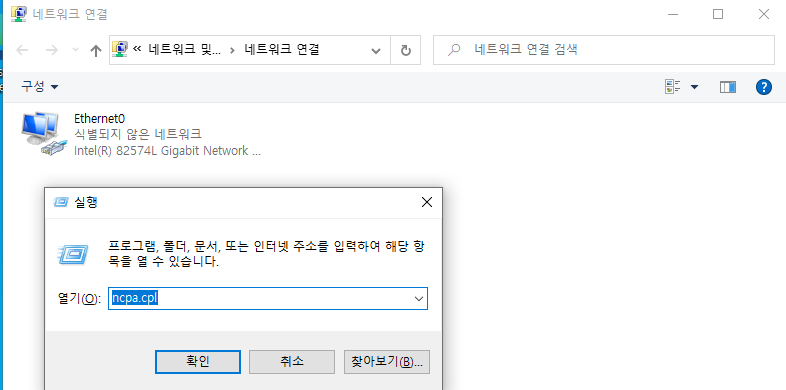
Pressing Windows + r brings up the Run window. Enter ncpa.cpl here and the window below appears.
Ethernet0 → Properties → Internet Protocol Version 4 (TCP/IPv4) → click Use the following IP address, and set it to the IP from the topology.
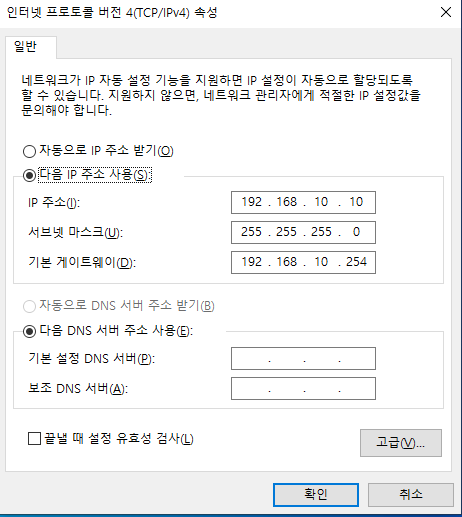
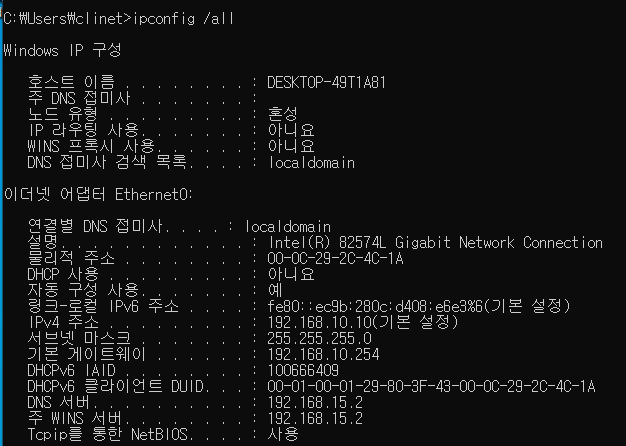
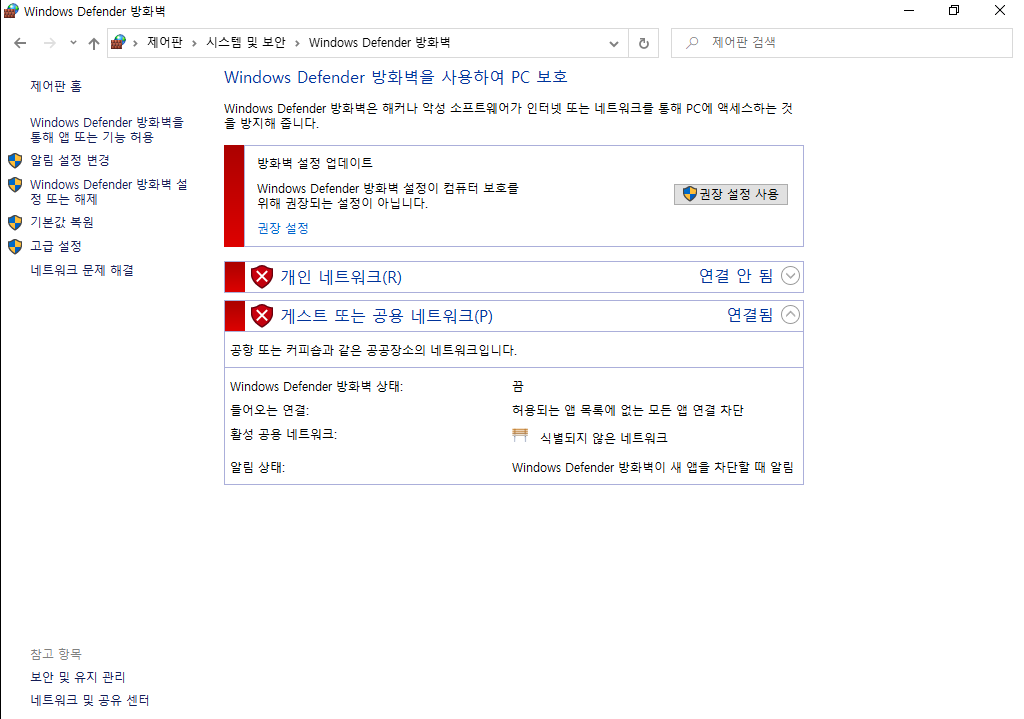
You can see it's configured well. Next is the firewall setting. Turn it all off.
As above, press Windows + r, enter firewall.cpl, go into Turn Windows Defender Firewall on or off, and turn it all off.
Common Ubuntu root password setup
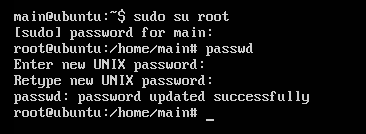
sudo su → passwd
For rebooting, typing init 6 reboots automatically.
Main-server Setting (Ubuntu 16.04)
apt-get -y install vim

vim /etc/network/interfaces
Installing vim may not work. Go down below and follow all the settings. Proceed with vi instead of vim.
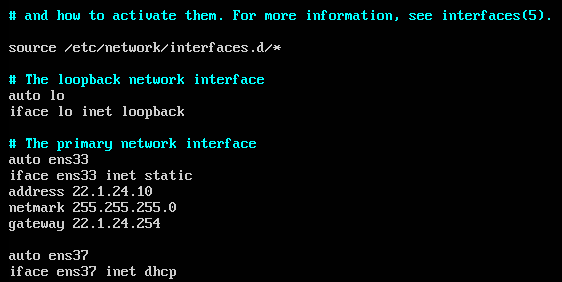
/etc/network/interfaces
At first it'll be iface ens33 inet dhcp; change dhcp to static and enter address, netmask, gateway as in the picture above. ens33 is the VMnet0 we configured and ens37 is VMnet8 (NAT). Since NAT must be received via dhcp, add iface ens37 inet dhcp to connect it to dhcp.
service networking restart

ifconfig
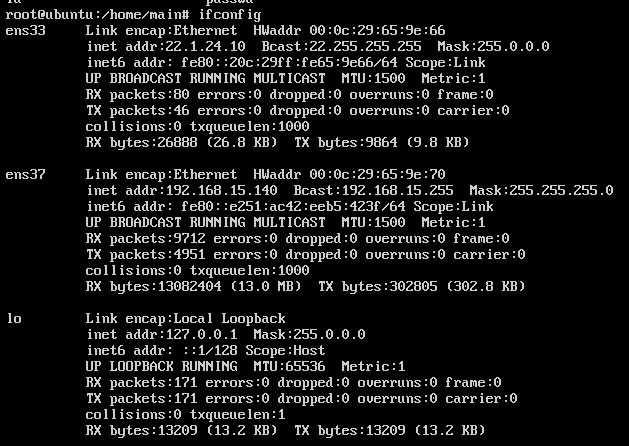
As below, you can see ens33's IP and ens37's dhcp IP were applied normally.
If apt-get -y install vim doesn't work, ens37 (NAT)'s DHCP failed, so you have to redo it.
First: try ifdown ens33 then install again → briefly bring down the static VMnet0 (ens33) virtual network and try downloading again
Second: if the first doesn't work, with ens33 down, enter dhclient ens37 to get reassigned.
If ping 8.8.8.8 (Google) goes through normally, you're connected to the internet. After that, get vim again.
This is the Ubuntu 16.04 network connection setup up to here.
Slave-server, (20.04)
It's quite a bit different...
ip addr
vim /etc/netplan/00-installer-config.yaml
On 20, unlike 16, ifconfig doesn't work. Entering it tells you to install net-tools, but since there's no internet connection you can't check this way — you can check with ip addr.
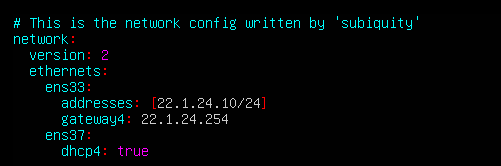
vim /etc/netplan/00-installer-config.yaml
netplan try
netplan apply
Check there are no problems with netplan try, then apply with netplan apply.
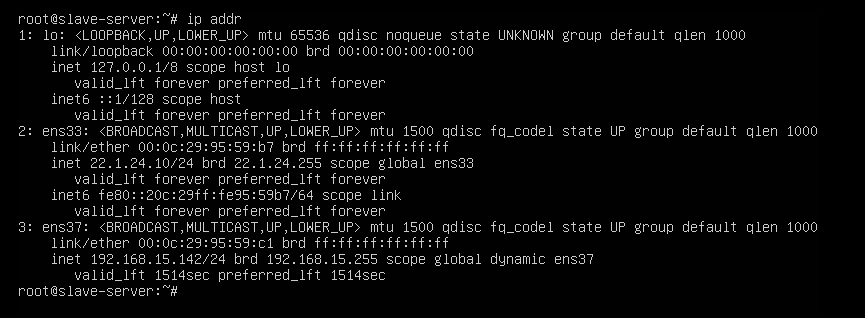
ens33 is VMnet0 and ens37 is VMnet8 (NAT). You can see ens33 went in statically fine and ens37 got dhcp applied fine.
But the ping may not go through. For that, just bring ens33 down. On version 20 you can turn it off with ip link set ens33 down. Now the ping goes through and you can install packages.
router (20.04)
Configure it the same as above, but with a slight twist.
ip addr
vim /etc/netplan/00-installer-config.yaml
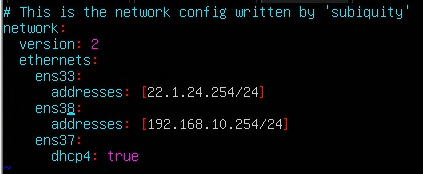
Entering ip add shows ens33, ens37, ens38. This is because, when configuring the router network, in my case I put them in VMnet0, VMnet8, VMnet1 order, so you must dhcp on ens37 for NAT to work properly. Check which order you put them in and write it as above.
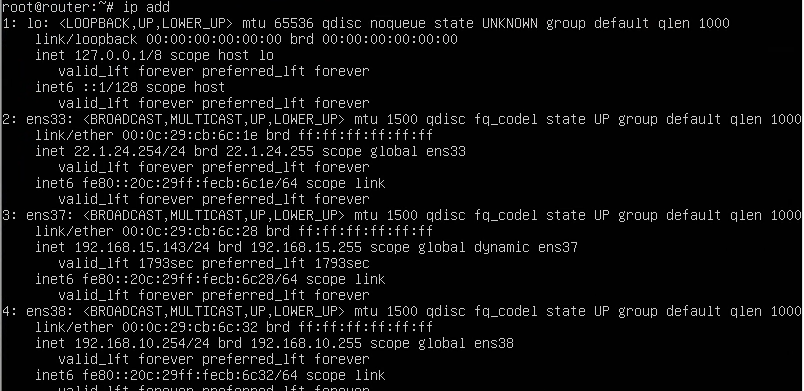
You can see it went in fine. Now briefly turn off the NAT feature on all servers, and check that pings go through to main-server, slave-server, and client. The command to turn it off is the same as shown above.
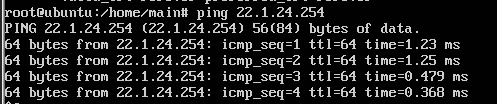
From main-server, ping → router
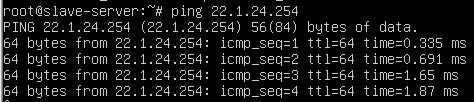
From slave-server, ping → router
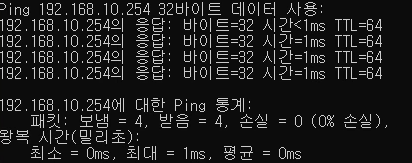
windows client → router
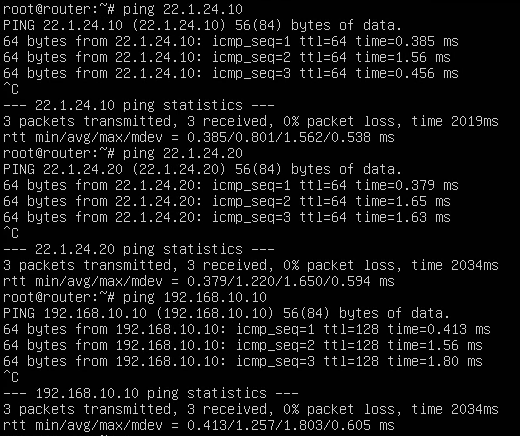
from router, ping → main, slave, client
You can see the pings all go through fine. That's it for today!
Original (Korean): tistory — published 2022-01-25, migrated to this blog. This translation was generated with the help of AI.