Linux account management
Example
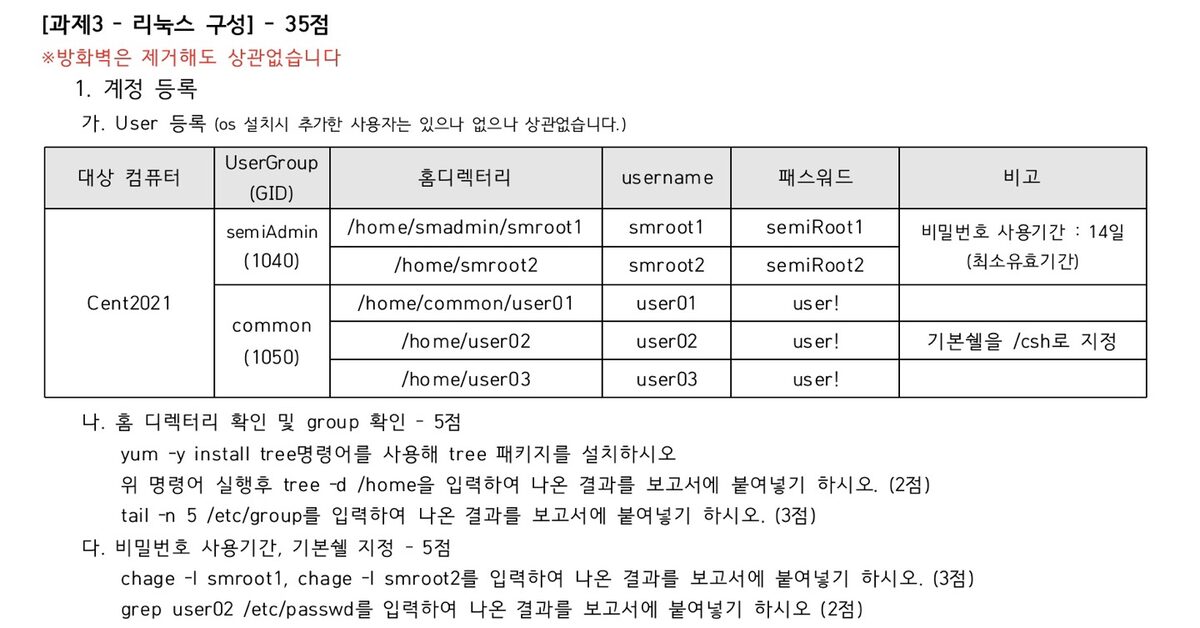
We'll solve this problem on the main-server. You must do this to be able to work on the next part.
The very first thing to do is create a UserGroup.
groupadd semiAdmin
groupadd common

vim /etc/group
Add them using groupadd as in the code above, then go into /etc/group and change to the numbers matching the problem.
Or just go into /etc/group and add them by hand directly.
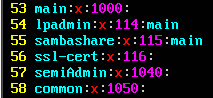
vim /etc/group
Change to semiAdmin:x:1040: and common:x:1050: as above. Then let's first create the 2 accounts in semiAdmin.
mkdir smadmin
useradd -d /home/smadmin/smroot1 -g semiAdmin -s /bin/bash -m smroot1
Since the smadmin directory doesn't exist, create it in advance, then in useradd use the -d option to set the directory location directly. Use -g to set the group, and since useradd requires configuring everything manually, you must also specify the shell type — so use the -s option to add /bin/bash. You must also add -m for the home directory to be created. For now, make one more account the same way.
useradd -d /home/smroot2 -g semiAdmin -s /bin/bash -m smroot2
Now with this, we've made all the accounts we need to create in the semiAdmin group. Now we'll set the 14-day password-usage period noted in the remarks. Here we use the chage command.
chage -m 14 smroot1
chage -l smroot1
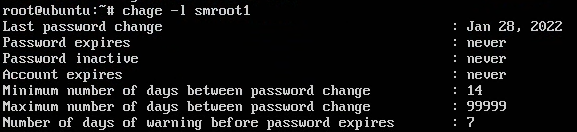
chage -l smroot1
You can see Minimum number of days between password change became 14. Since it's the minimum validity period, you must use -m as the option. For Maximum, it's the -M option. Setting both like this finishes the semiAdmin group entirely. Now let's configure the common group side.
mkdir common
useradd -d /home/common/user01 -g common -s /bin/bash -m user01
useradd -d /home/user02 -g common -s /bin/csh -m user02
useradd -d /home/user03 -g common -s /bin/bash -m user03
I trust you know this by now. What to explain: set -g to common, and looking at user02, it said to set /csh — that's also one of the shell types so it's in /bin. Configuring it that way finishes account creation. Now you just need to set passwords. The commands are all common.
passwd smroot1
passwd smroot2
passwd user01
passwd user02
passwd user03
Using the passwd command as above, set the passwords identically to the table above. Now, here's the answer to the problem below.
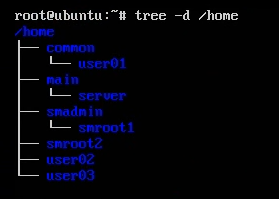
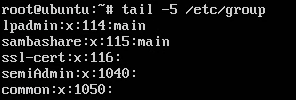
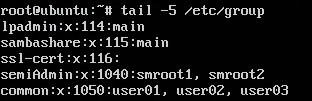
Doing it with the command above, it'll look like the left. For the right case, you can do it that way for visibility (it works fine even without writing it..).
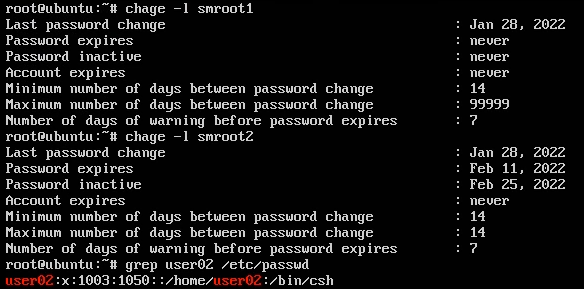
If it shows up as above, you've completed everything. This is the extent of the problem. Now for the additional setup. Let's touch the SSH config to make only semiAdmin able to connect via SSH.
vim /etc/ssh/sshd_config

vim /etc/ssh/sshd_config
Configure it as above. Besides AllowGroups, others exist too. Since AllowGroups isn't written as a comment, add and write it in the position you want.
When allowing specific users
- AllowUsers, User, Buser, Cuser, Duser
- List them using space as the delimiter.
When allowing a specific account from a specific IP
Changing Allow to Deny blocks them all (AllowUsers, AllowGroups, DenyUsers, DenyGroups).
After this, restart the sshd service and let's try connecting from the Windows client.
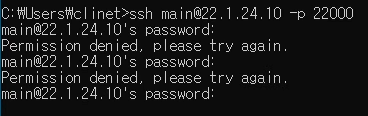
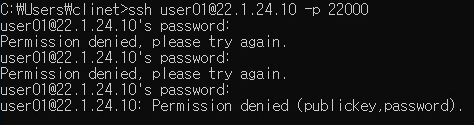
connecting as main connecting as user01
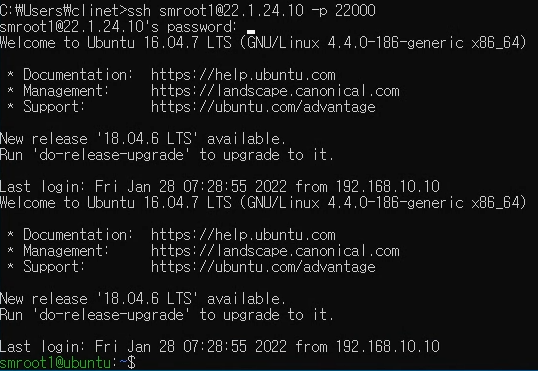
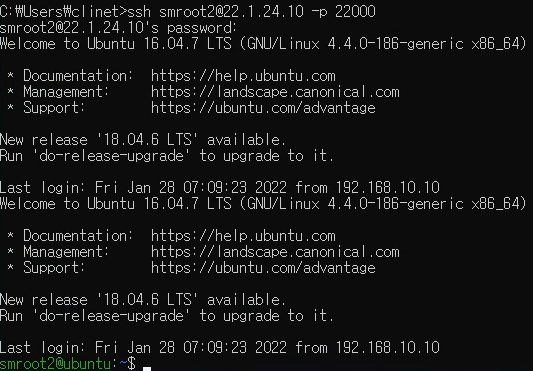
connecting as smroot1 connecting as smroot2
You can confirm that everything other than the configured group name semiAdmin cannot connect, and only accounts that have semiAdmin as their group can connect via SSH.
DNS configuration
DNS configuration is done on the slave-server.
apt install bind9
Install bind9 with the command above. We'll use bind9 to use DNS.
cd /etc/bind
ll
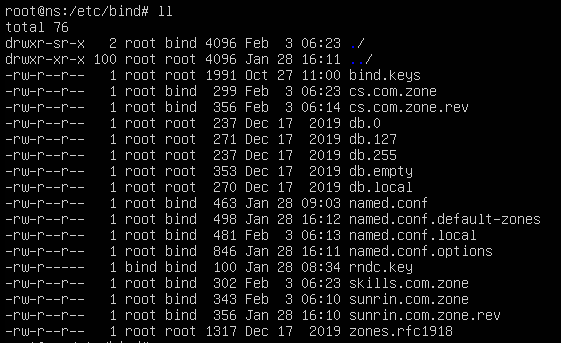
ll
This is what it looks like when you type ll. I already made many zones in advance so there's various stuff, but you don't need to mind it particularly.
vim named.conf
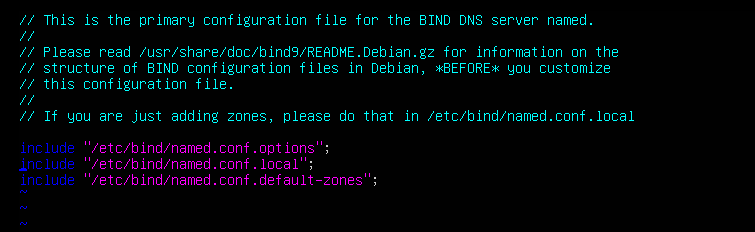
vim named.conf
All DNS configuration is done in named.conf, but as you can see from the note above, it says not to add here. Among the includes, we'll add the zone in a place called named.conf.local.
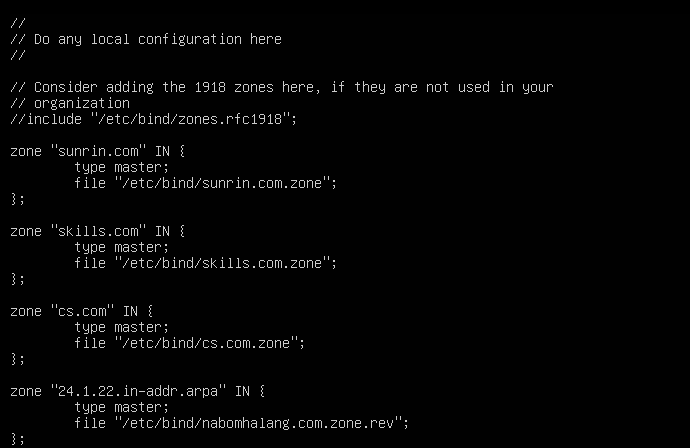
vim named.conf.local
Since I set it up in advance, it shows up like this, but originally there'll be nothing written. To use the domain you want, do it as in the picture above.
zone "domain name" IN {
	type master;
   	file "zone file path";
};
Write it as above. This is the forward direction. It's the form that converts domain (text) → IP (number).
zone "ip-written-in-reverse.in-addr.arpa" IN {
	type master;
   	file "zone file path";
}
Writing it as above configures the reverse direction. It converts IP (number) → domain (text).
Now we'll actually create the file we noted in the file path. Rather than typing it all out here, we'll copy db.local and use it.
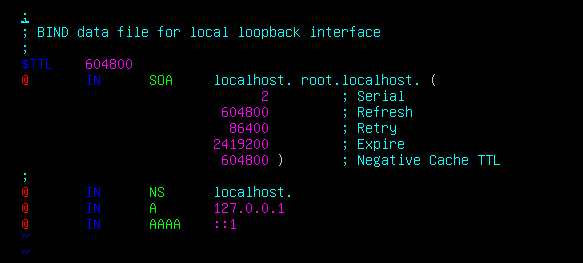
db.local
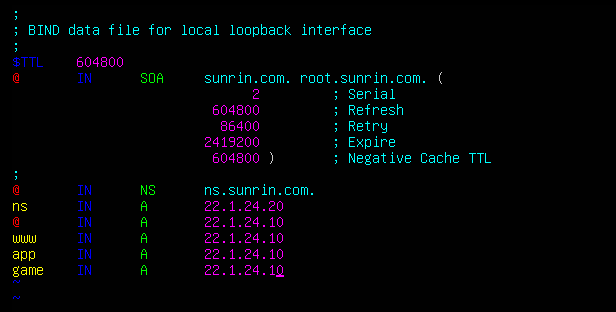
sunrin.com.zone
Since I set the name to sunrin.com.zone, I made it as is. In the SOA part above, change the localhost part to your own domain, and change the NS part below too. After that, since you must announce the ns, looking at the 2nd line you can see the ns address is announced. @ is for when there's no subdomain at all; otherwise you must write it in front, and it'll move to the IP written behind. After this
systemctl restart bind9
service bind9 restart
Restart bind9 with whichever of the 2 commands above you want. Then, from the Windows client, enter nslookup in cmd.
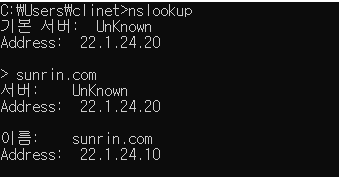
When entering sunrin.com
You can see sunrin.com points to 22.1.24.10. Now, if you enter that domain for SSH and web service too, connection succeeds. Install vmware-tools, install FileZilla and Putty, and let's connect to the main-server with FileZilla.
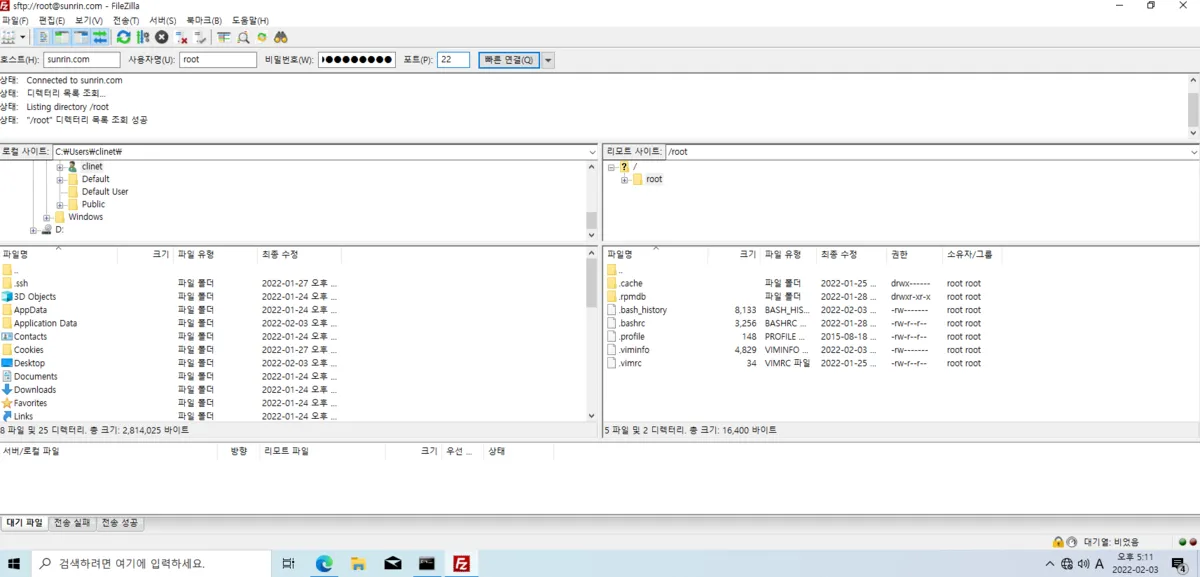
Here's the successful connection.
I changed the port back to 22, but if you happened not to change it, use port 22000 and it should connect...
If it happens not to connect, try configuring sftp once.
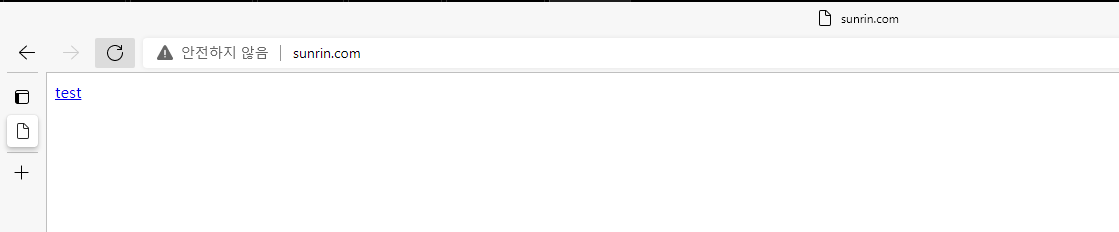
You can confirm that connecting to sunrin.com connects to 22.1.24.10.
That's it for today. You've succeeded all the way through DNS~
Original (Korean): tistory — published 2022-01-28, migrated to this blog. This translation was generated with the help of AI.