What is EC2 (Elastic Compute Cloud)?
Amazon Elastic Compute Cloud (Amazon EC2) provides scalable computing capacity in the Amazon Web Services (AWS) cloud. Using Amazon EC2 eliminates the need to invest in hardware up front, so you can develop and deploy applications faster. You can use Amazon EC2 to launch as many virtual servers as you need, configure security and networking, and manage storage. Amazon EC2 lets you scale up or down to handle changes in requirements or spikes in popularity, reducing the need to forecast traffic. — official Amazon docs
EC2 is a service that lets you rent an independent computer and use it as your own.
Benefits of EC2
- You can spin up a machine extremely easily.
- It's easy to match the exact spec you want — you just pay for what you pick (ouch).
- You can attach EBS (Elastic Block Store) volumes for persistent storage.
- You can assign a fixed IP using an EIP (Elastic IP Address).
Using VPC & EC2
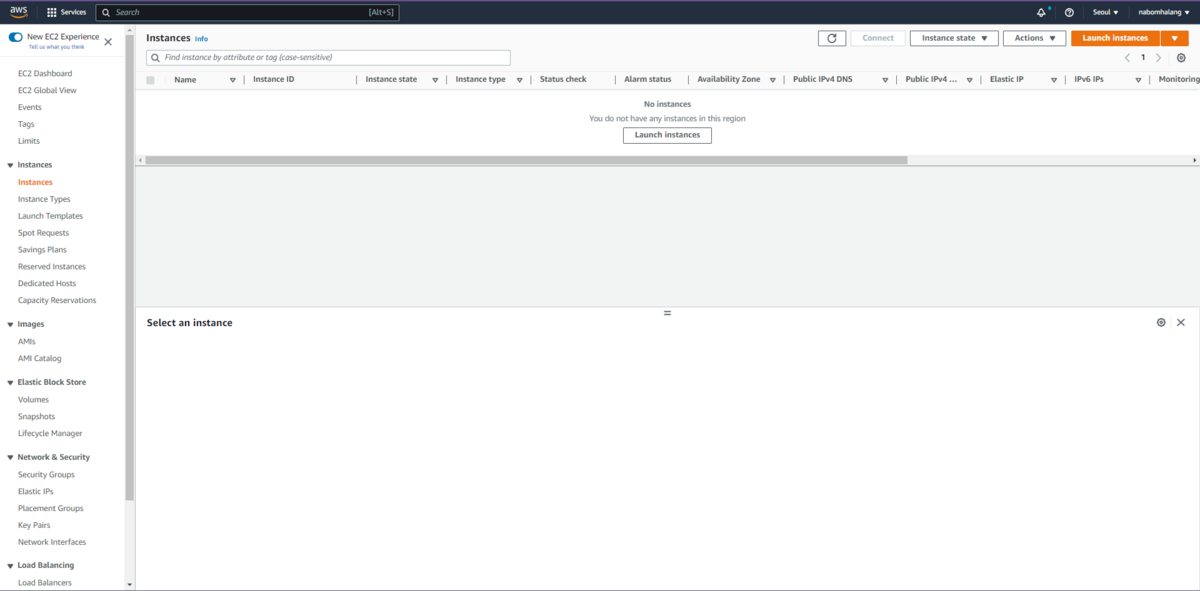
This assumes the VPC setup from the previous post is complete. On the EC2 page, click Launch instances.
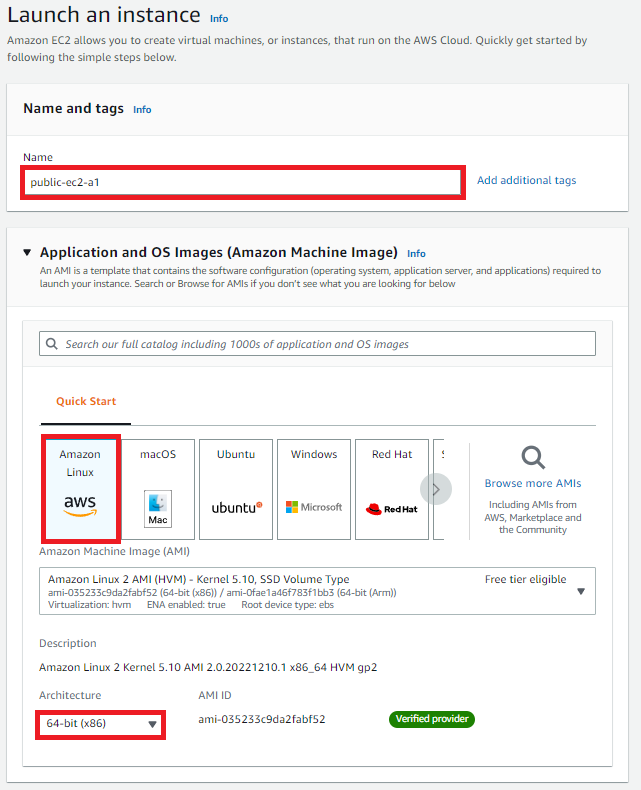
I chose Amazon Linux for the AMI, but pick whatever you prefer. For more AMI options, click Browse more AMIs to the right of Quick Start.
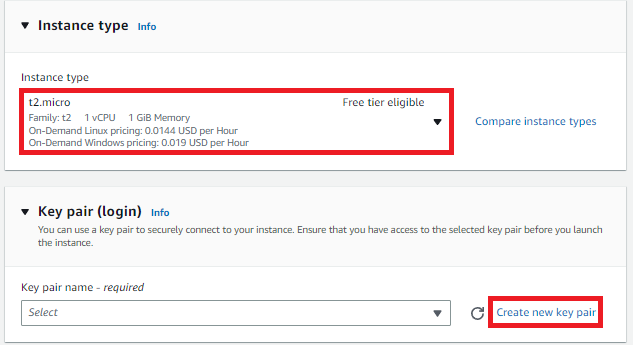
Instance type lists many instance profiles for different performance levels — choose what you need. Next, since we have no key pair yet, we need to create one: click Create new key pair on the right.
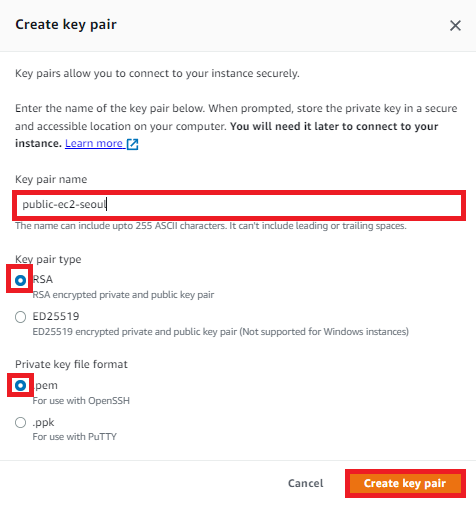
Just set a proper key name and click Create key pair. Keep the key somewhere safe — don't lose it.
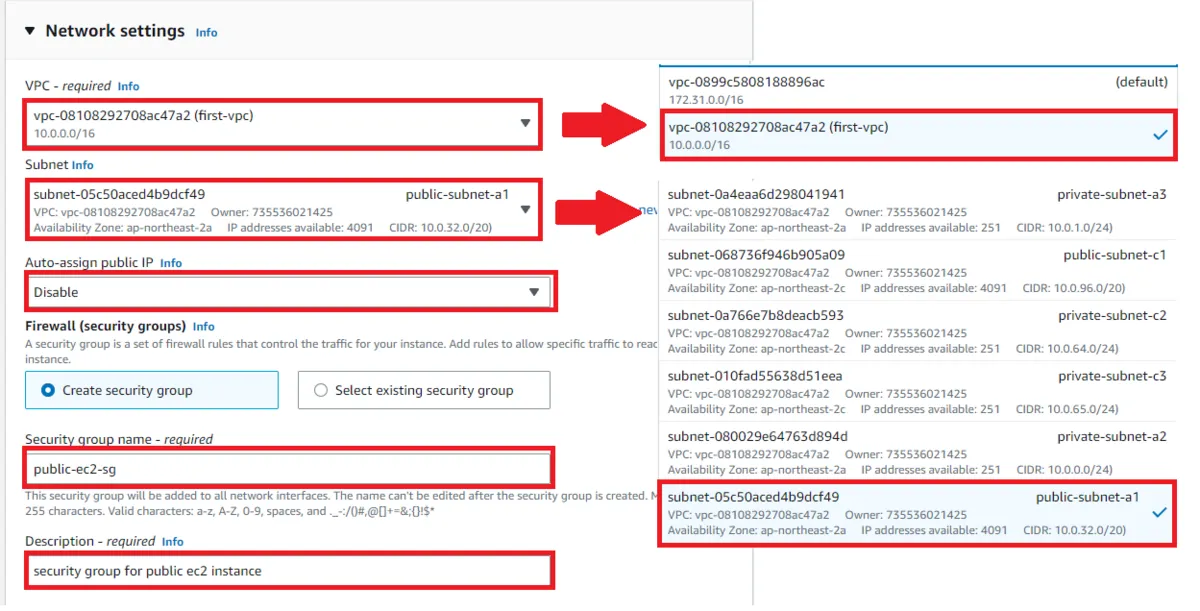
Right below is Network settings. Your screen may look different — just click Edit. Set the VPC and Subnet. Auto-assign public IP would hand out a public IP automatically, but since we'll attach a fixed EIP ourselves, I set it to Disable.
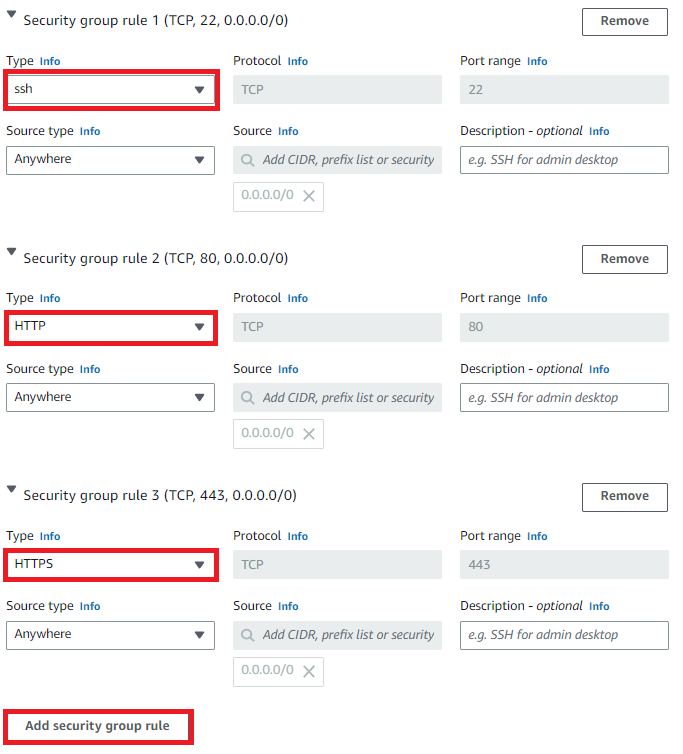
Configure this to match the server's future role. I'm going to serve web traffic, so I additionally opened the HTTP and HTTPS ports.
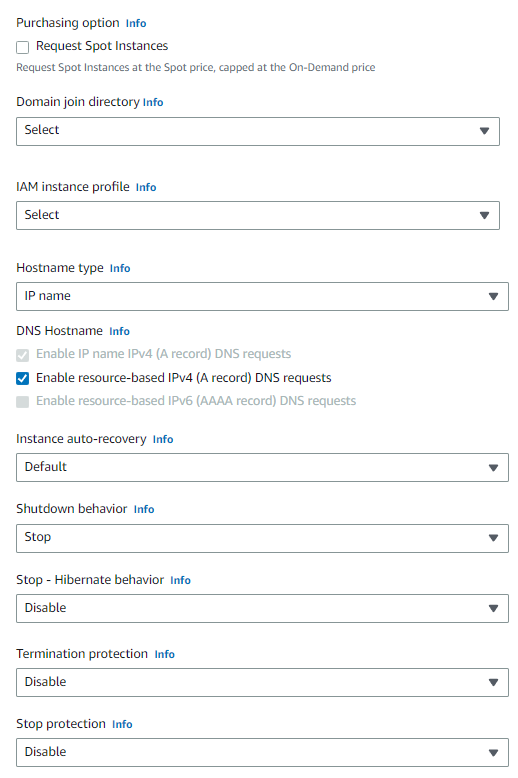
- Request Spot Instances asks whether to use Spot Instances, which terminate when the market price rises above your bid and start again when it falls. I want on-demand — the server must respond whenever users ask — so I leave it unchecked.
- Domain join directory is AWS's fully managed Microsoft Active Directory service; this field asks whether to use it.
- IAM instance profile — IAM (Identity and Access Management) controls and manages permissions to AWS resources. If you already have an IAM role, assign it here.
- Hostname type decides whether the hostname contains the IP or resource identifiers like the instance ID.
- Instance auto-recovery decides whether the instance recovers automatically when it fails a system status check.
- Shutdown behavior chooses whether a shutdown from inside the OS STOPs or TERMINATEs the instance.
- terminate instance: shutting down permanently removes the VM and deletes all data. The EBS volume is detached and deleted as well.
- stop instance: the key difference is that stop does not delete the EBS volume. Standard EBS charges still apply.
- Stop - Hibernate behavior lets you choose to hibernate the instance instead.
- Termination protection guards the instance against being terminated by accident. When enabled, you can't terminate it directly from the CLI or the management console.
- Stop protection likewise protects the instance from being stopped by accident.
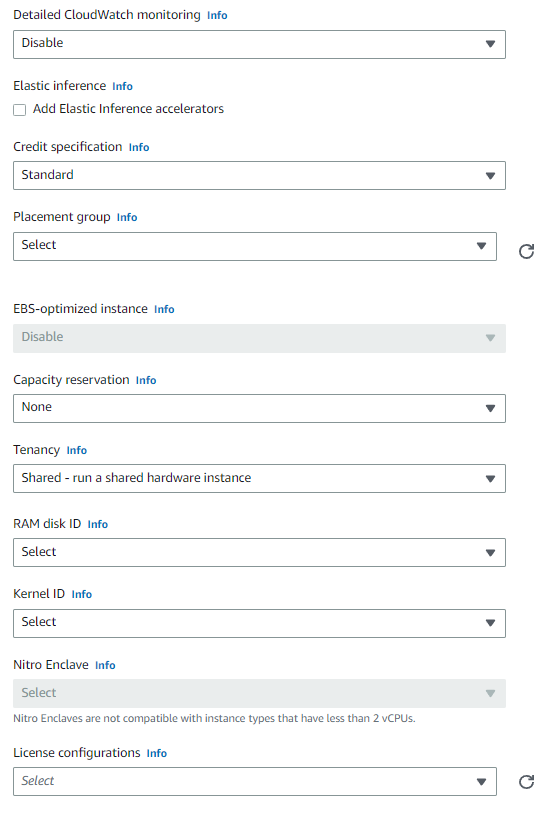
- Detailed CloudWatch monitoring — CloudWatch already monitors instance metrics for free; enabling this adds extra fine-grained metrics, and of course extra cost.
- Elastic inference is used when you need hardware acceleration, e.g. for deep learning.
- Credit specification — AWS supports burstable performance instances.
- These normally run at a fixed baseline performance and use credits to burst above it when more compute is needed for a moment.
- Choosing unlimited means AWS lends you extra credits even when you run out, so you can burst whenever needed. It's paid, and misused it can cost more than simply running a bigger instance.
- Placement group decides where the instance is physically placed when created.
- EBS-optimized instance provides improved EBS performance. Only available on certain instance types.
- Capacity reservation pre-reserves instance capacity in a specific availability zone.
- To launch into an existing reservation, choose Target by ID or Target by Group.
- If you don't use it, choose None.
- If you want this instance to join a reservation you'll create later, choose open.
- Tenancy — since instances may share physical servers with other customers, use this when you need physical isolation via dedicated instances or dedicated hosts. Extra charges apply.
- For a dedicated instance, pick Dedicated - run a dedicated instance.
- For a dedicated host, pick Dedicated host - launch this instance on a dedicated Host.
- Otherwise pick Shared - run a shared hardware instance.
- RAM disk ID and Kernel ID are best left at their Select defaults.
- Nitro Enclave lets you protect and process sensitive data safely inside the instance. Only on certain instance types.
- License configurations applies licenses defined in AWS License Manager to the instance.
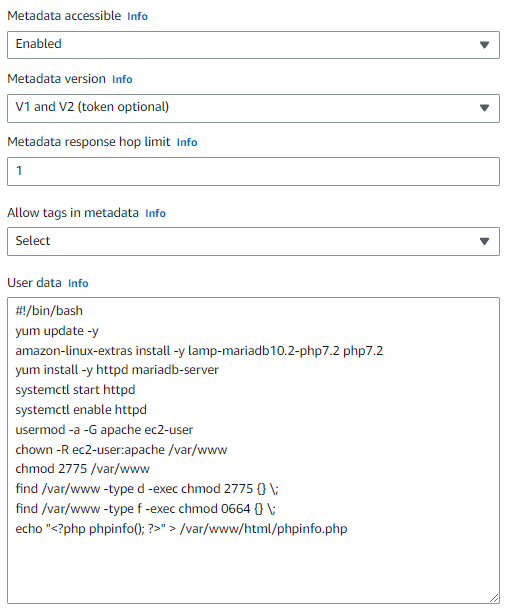
- Metadata accessible chooses whether instance metadata can be accessed.
- Metadata version selects the instance metadata version.
- Metadata response hop limit restricts the allowed hop count for metadata responses.
- Allow tags in metadata chooses whether the instance may access its tags through metadata.
- User data is where you put a script that runs as root when the instance boots.
- Example link ← sites like this show how to write whatever bash script you need.
Once everything is configured, click Launch instance.

It was created successfully — but because we disabled auto-assign, there's no Public IPv4. Let's go set up an EIP.

Under Network & Security, click Elastic IPs, then Allocate Elastic IP address.
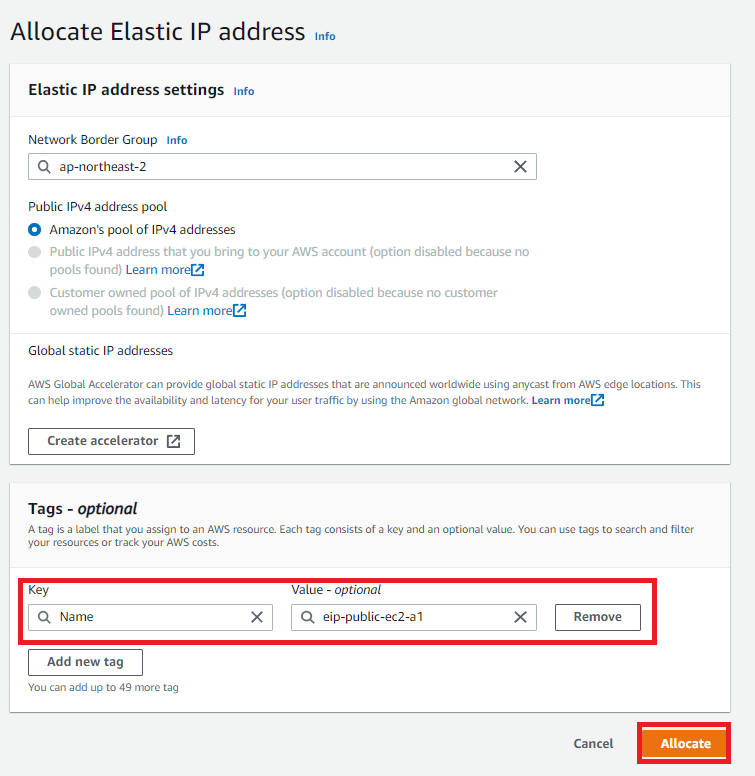
Set just the Name tag and create it with Allocate.
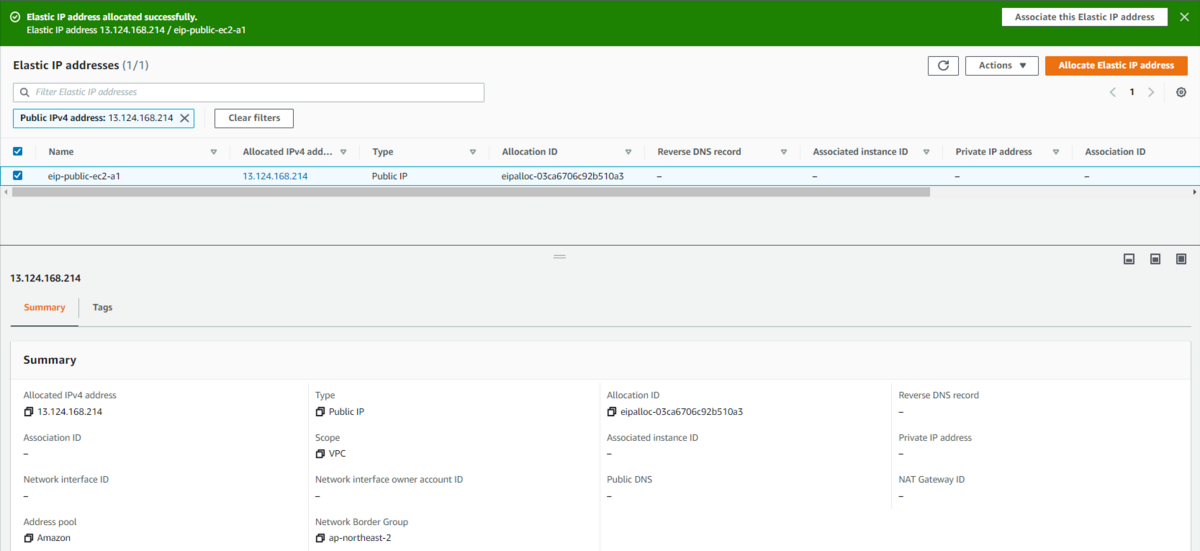
Created successfully. Now click Associate this Elastic IP address at the top to attach it to the EC2 instance.
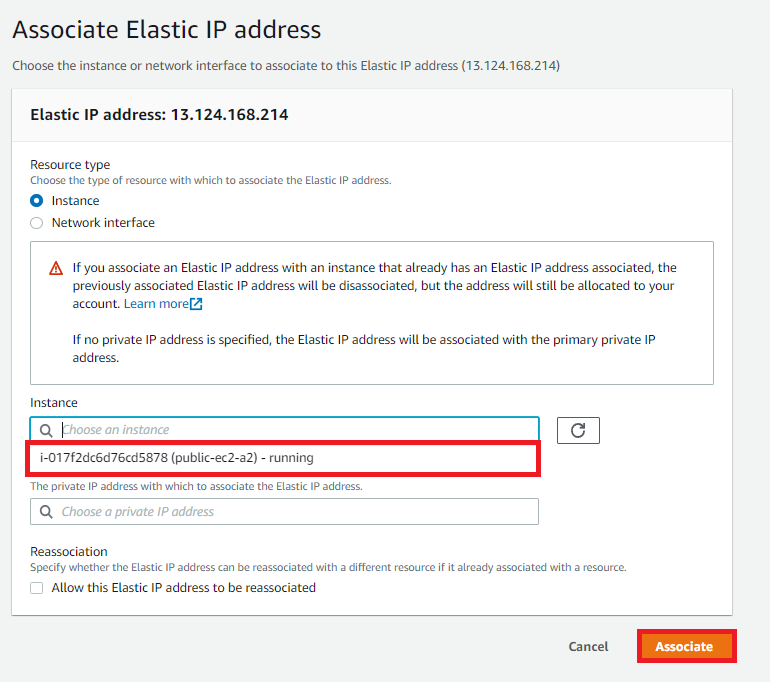
Select the instance as shown above and Associate it.
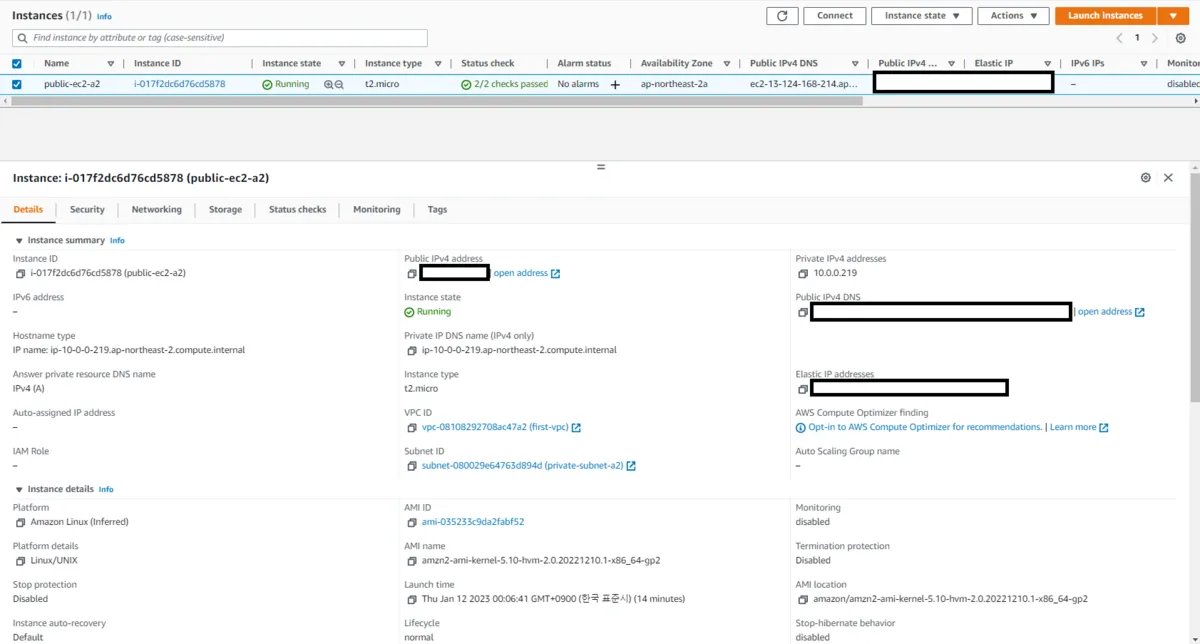
The Public IPv4 is now assigned. Let's connect to the instance. Put the following into your ~/.ssh/config file.
Host public-ec2-a1
    HostName [DNS or IP]
    User ec2-user
    IdentityFile [.pem file location]
    Port 22
Once added, typing "ssh public-ec2-a1" in your terminal connects you to the instance.
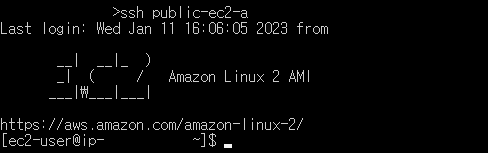
Connected without a problem. Now let's open the website via the public IP.
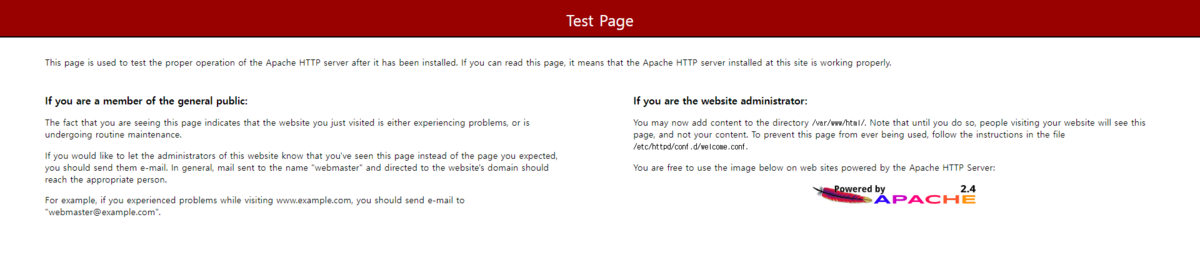
Apache is installed and running. Now let's hit the phpinfo.php from the end of the script.
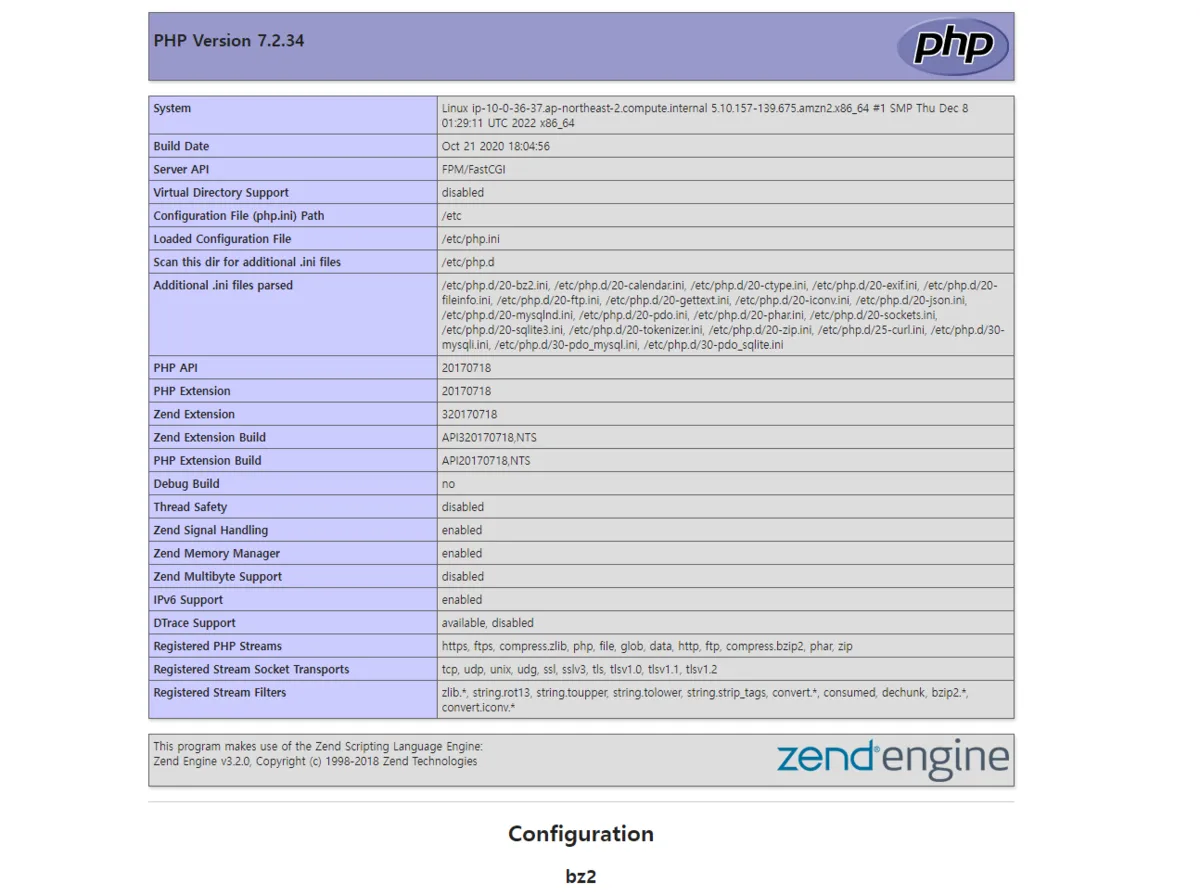
It opens perfectly!
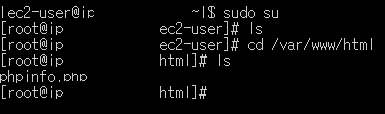
The user-data script clearly did its job. Now let's build public-subnet-c1 — save public-ec2-a1 as an AMI and clone it.
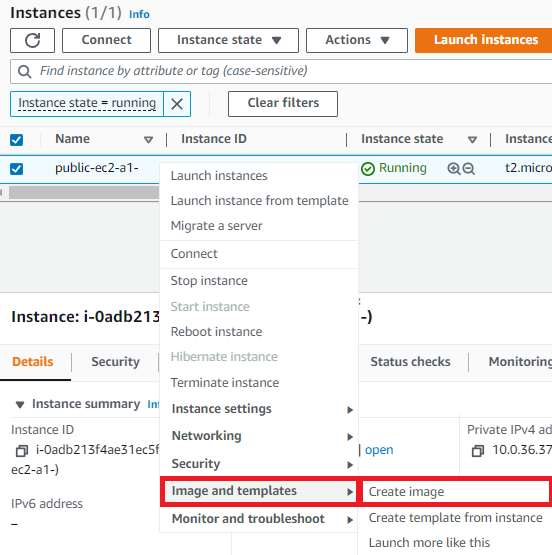
Check public-ec2-a1, right-click, then Image and templates → Create image to build the AMI.
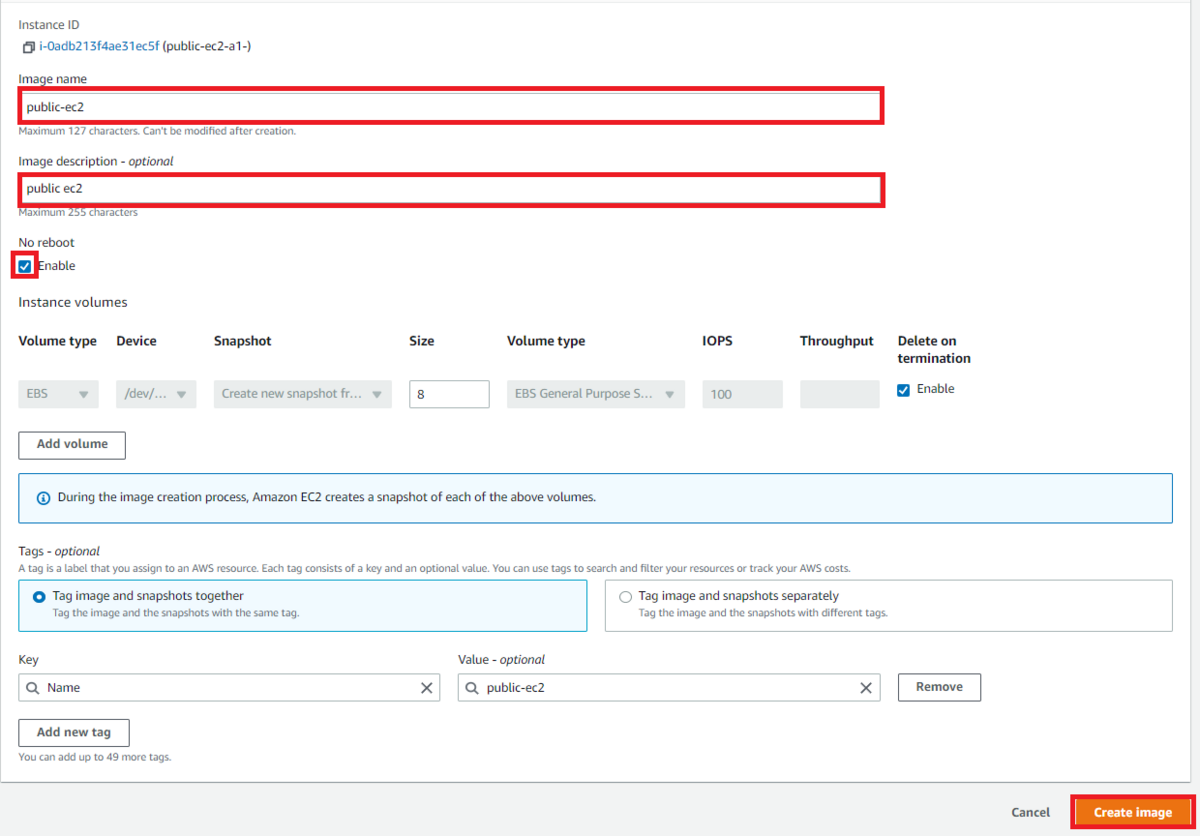

Under AMIs you can confirm it was created properly.
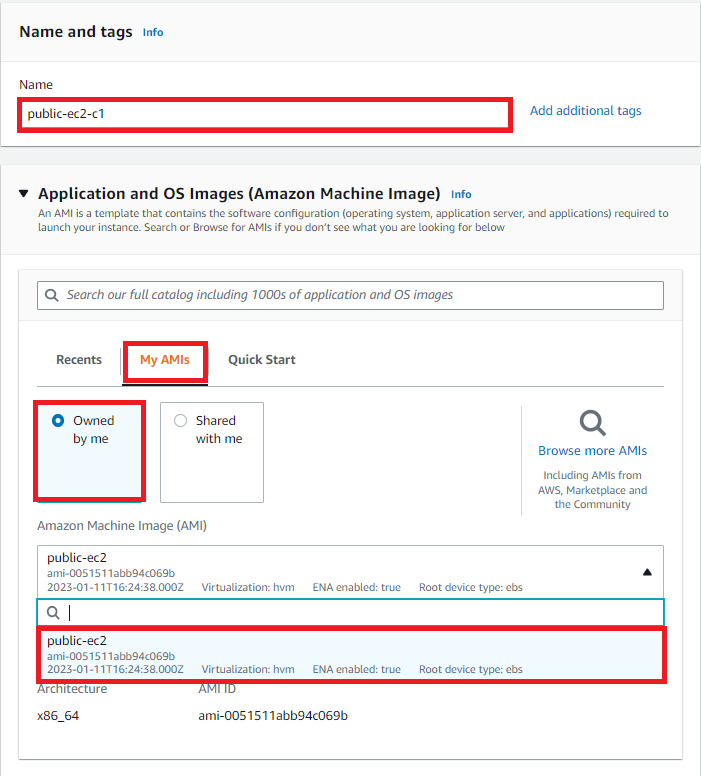
Launch a new instance as shown above with the same settings as before, minus the user-data. Then create and attach an EIP as well.
Host public-ec2-c1
    HostName [DNS or IP]
    User ec2-user
    IdentityFile [.pem file location]
    Port 22
Now apply the code above on c1. The website opens fine via IP or domain.
Well done — you've now covered all the basics of using EC2!
Original (Korean): tistory — published 2023-01-11, migrated to this blog. This translation was generated with the help of AI.